"How to Add a Signature in Outlook - Email Signatures | CTG Marketing"
How to Create/Add Outlook Signature
Your email signature is like your business card, and should be considered imperative for effective communication. Despite the growth of social media as an alternative marketing platform for establishing a corporate identity or reaching out to diverse stakeholders, it’s still powerful way with which you can offer contact information that will not get lost in translation electronically.
Email signatures are an important form of branding and illuminating who you work for. This ensures that no matter how many times someone emails us from our company account without including their name on every message we know exactly where these messages came from.
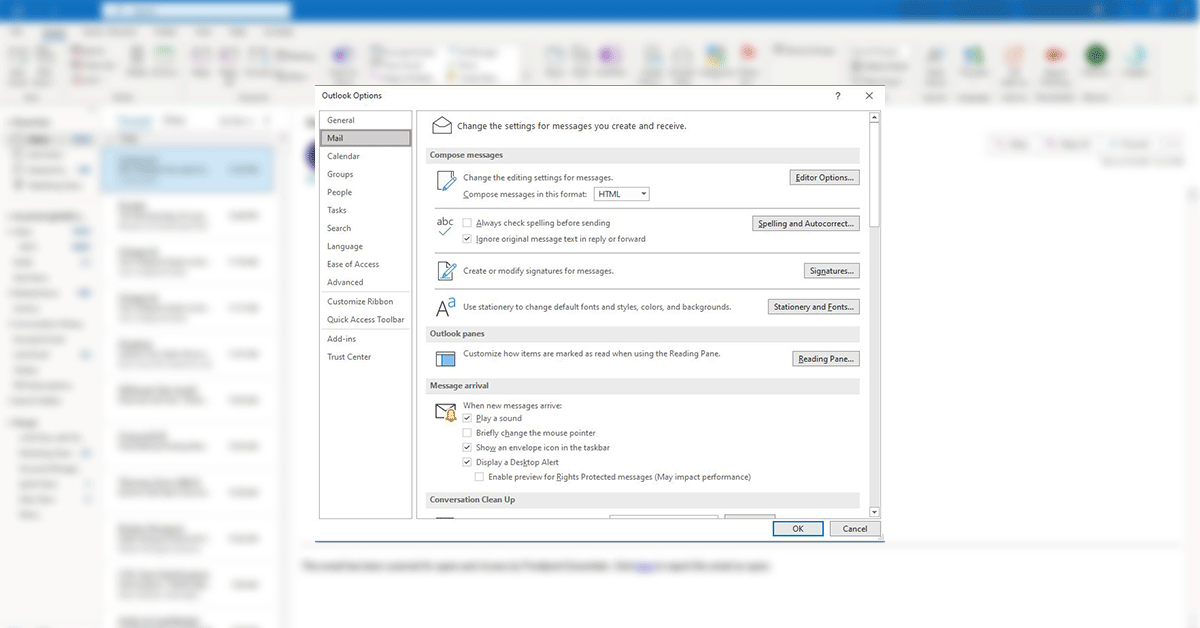
Create your signature and choose when Outlook Desktop Application adds a signature to your messages
Important: If you have a Microsoft Microsoft 365 account, and you use Outlook and Outlook on the web or Outlook on the web for business, you need to create a signature in both products. To create and use email signatures in Outlook on the web, see Create and add an email signature in Outlook.com or Outlook on the web.
- Open a new email message.
- On the Message menu, select Signature > Signatures.
- Under Select signature to edit, choose New, and in the New Signature dialog box, type a name for the signature.
- Under Edit signature, compose your signature. You can change fonts, font colors, and sizes, as well as text alignment. If you want to create a more robust signature with bullets, tables, or borders, use Word to format your text, then copy and paste the signature into the Edit signature box. You can also use one of our pre-designed templates for your signature. Download the templates in Word, customize them with your personal information, and then copy and paste them into the Edit signature box.
- Under Choose default signature, set the following options for your signature: In the E-mail account drop-down box, choose an email account to associate with the signature. You can have different signatures for each email account.If you want your signature added to all new messages by default, in the New messages drop-down box, select one of your signatures. If you don’t want to automatically add a signature to new messages, choose (none). This doesn’t add a signature to any messages you reply to or forward.If you want your signature to appear in the messages you reply to and forward, in the Replies/forwards drop-down, select one of your signatures. Otherwise, accept the default option of (none).
- Choose OK to save your new signature and return to your message. Outlook doesn’t add your new signature to the message you opened in Step 1, even if you chose to apply the signature to all new messages. You’ll have to add the signature manually to this one message. All future messages will have the signature added automatically. To add the signature manually, select Signature from the Message menu and then pick the signature you just created.
Need help to design your signature? | Free Email Signature Generator
Create your signature on Outlook Web Application
- Sign in to Outlook on the web.
- Go to Settings Settings > View all Outlook settings > Compose and reply.
- Under Email signature, type your signature and use the available formatting options to change its appearance. Note: You can have only one signature per account.
-
- If you want your signature to appear at the bottom of all new email messages that you compose, select the Automatically include my signature on new messages I compose check box.
- If you want your signature to appear on messages that you forward or reply to, select the Automatically include my signature on messages I forward or reply to check box.
- If you don’t select these options, you can manually add your signature to a selected message. For details, see Manually add your signature to a new message below.
4. Select Save when you’re done.
